Stonewall Kitchen, LLC

Wednesday, December 31, 2008

Happy New Year from Jet-Chef.com!


I want to thank everyone who has helped to make the Jet-Chef.com directory a huge success in 2008! The Jet-Chef.com find-it-fast directory has quickly grown from a simple inflight catering directory for the private jet charter industry to a diverse directory for a variety of travelers! On our directory, we now feature caterers, private chefs, florists, restaurants and other service providers from around the U.S., Canada and beyond!

To thank everyone for their support, we want to extend FREE 6-month Basic Memberships to caterers, private chefs, restaurants and other service providers who want to advertise their businesses to the private jet charter industry, travel agents and other travel industry insiders! Log on today to Jet-Chef.com and start your listing with absolutely no obligation! In a challenging economy, it is vital for small businesses to explore new business niches and continue to advertise and market. Come and explore the private jet charter industry as a potentially lucrative niche for your business at NO CHARGE!

Flavor Trends for 2009: Masala

From my previous posts (11/16, 11/19, 11/23, 12/3, 12/10, 12/28), I revealed that I am truly fascinated with food trends, and experimenting with new flavors. Recently, Mintel, the consumer, media and market research company, tallied the top food and flavor trends for 2009. Here are the top seven flavor trends for 2009:

1. Persimmon (featured in November 16th blog post)
2. Starfruit (featured in November 19th blog post)
3. Lavender (featured in November 23rd blog post)
4. Cactus (featured in December 3rd blog post)
5. Chimichurri (featured in December 10th blog post)
6. Peri-Peri (featured in December 28th blog post)
7. Masala

In this post, I will spotlight the interesting flavor of Masala! This is the last of this series of posts, and I want to thank you all for following and offering some of your own recipes and thoughts about these flavor trends!

(image from www.cookingwithfriendsclub.com)

#7 Masala: What is Masala? According to www.howtocookcurry.co.uk, Masala is "spices, herbs and other seasonings ground or pounded together. When wet ingredients like water, vinegar, yogurt etc. are added to the spice mixture it is appropriately called a "wet masala". Dry spice mixtures are also called "Garam masala" or commonly known in the world as "Curry powder". Indian cooks generally don't use pre-prepared curry powder - originally a British invention to approximate Indian seasoning - but prefer making their own ever changing blends."

In the United Kingdom, Chicken Tikka Masala is one of the most popular curries, and here is a YouTube video that shows how to prepare Chicken Tikka Masala:


Here is a recipe for Garam Masala from www.Epicurious.com:

Garam Masala
Epicurious, November 2007
Suvir Saran

Yield: Makes about 3/4 cup

Editor's note: The recipe and introductory text below are from Suvir Saran's book American Masala.

Garam Masala is the Indian equivalent of French herbes de Provence or Chinese five-spice powder. The recipe changes from region to region within northern India and can be varied according to whim. Here, rosebuds (found in Indian or Middle Eastern markets) add an exciting floral note, but you can substitute black cardamom, fennel seeds (in the style of Kashmir), or a teaspoon of royal cumin (shahi or kala zeera, also found in Indian markets)—or just eliminate the roses altogether. Once you taste the difference that this simple powder makes in your cooking, you will find it worth the investment of cupboard space. As a rule (one that certainly gets broken at times), garam Masala is only added at the last step of cooking, almost like a fresh herb, because it tends to become bitter if cooked too long.

Ingredients:

1 tablespoon dried miniature rosebuds (optional)
A 1-inch piece cinnamon stick, broken into pieces
2 bay leaves
1/4 cup cumin seeds
1/3 cup coriander seeds
1 tablespoon green cardamom pods
1 tablespoon whole black peppercorns
2 teaspoons whole cloves
1 dried red chile
1/4 teaspoon freshly grated nutmeg
1/8 teaspoon ground mace

Preparation:

If the roses have stems, break them off and discard. Heat the roses with the cinnamon, bay leaves, cumin seeds, coriander seeds, cardamom pods, whole peppercorns, cloves, and chile in a medium skillet over medium-high heat, stirring often, until the cumin becomes brown, 2 1/2 to 3 minutes. Transfer to a spice grinder or coffee mill, add the nutmeg and mace, and grind until powder fine. Store in an airtight container for up to 4 months.

With this Garam Masala, you can prepare this recipe, also from Epicurious.

(image from www.Epicurious.com, photo by: Romulo Yanes)

Shrimp Tikka with Fresh Mango Chutney
Gourmet, June 2008
by Melissa Roberts

Yield: Makes 6 servings
Active time: 45 min
Total time: 1 hr

Shrimp get a wake-up call from a bold spice paste that really packs a punch. A brief 30-minute swim in the marinade imbues the shrimp with intense flavor—jalapeño, ginger, and garlic lend heat, while garam masala contributes depth. Sparkle comes from a splash of lime juice. Think of the mango chutney as a fresh Indian salsa; it's crunchy, colorful, tart, and very refreshing.

Ingredients:

For shrimp:
1/4 cup vegetable oil
2 tablespoons fresh lime juice
1 (1-inch) piece fresh jalapeño, chopped (about 2 teaspoons)
1 (1-inch) piece peeled ginger, chopped
1 large garlic clove, smashed
2 teaspoons ground garam masala
3/4 teaspoons turmeric
1/8 teaspoons grated nutmeg
2 pound large shrimp in shell, peeled, leaving tail fan attached

For chutney:
1 teaspoon ground cumin
1 (3/4-pound) unripe mango, chopped
1/3 seedless cucumber, peeled and chopped (3/4 cup)
1/2 cup chopped red onion
1 to 2 teaspoons minced fresh jalapeño with seeds
3 tablespoons fresh lime juice
3 tablespoons thinly sliced mint
3 tablespoons chopped cilantro

Equipment: 10 (12-inch) wooden skewers, soaked in water 30 minutes
Accompaniment: lime wedges

Preparation:

Marinate shrimp:
Purée all ingredients for marinating shrimp, except shrimp, with 1/2 tsp salt in a blender until smooth. Pour into a sealable bag, then add shrimp and marinate at cool room temperature, turning bag occasionally, 30 minutes. Make chutney while shrimp marinate: Toast cumin in a dry small skillet over medium heat, stirring occasionally, until fragrant, about 1 minute.

Stir together remaining chutney ingredients with 1/4 tsp salt, then sprinkle with toasted cumin.

Make kebabs:
Prepare grill for direct-heat cooking over hot charcoal (medium-high heat for gas);

Thread 4 shrimp onto each skewer, leaving small spaces between them. Put on a tray.

Oil grill rack, then grill skewers, covered only if using a gas grill, turning once, until just cooked through, 4 to 6 minutes total. Serve with chutney.

Cooks' notes:
·Shrimp can be cooked in a hot well-oiled large (2-burner) ridged grill pan, turning once, about 8 minutes total.
·Marinade can be made 1 day ahead and chilled.
·Chutney can be made 6 hours ahead and chilled.


Visit Jet-Chef.com to find a caterer, personal chef or restaurant that features unique, exotic flavor trends that include masala and so many more!

Are you a caterer, personal chef or restaurant and want to be part of the Jet-Chef.com success? Log on to Jet-Chef.com and start your listing today for as little as $29.00/6 month membership! Contact us via email at info@imaiusa.com or call us toll-free at 1-877-774-1255.

Today is National Champagne Day!

Today is National Champagne Day! I know that I will be enjoying a flute of the bubbly later tonight, and I want to wish you all a very Happy New Year! I thought that I would not include any recipes, as let's face it, it is pretty easy to figure out how to celebrate National Champagne Day! And, I want to send out a sincere thanks to all of you who have responded to my series of National Food Days with your own recipes as well. If you would like to share your recipes, or your food/beverage related business on the Jet-Chef blog, please contact me!

(image from www.bpcouncil.com)

I did find a couple of amazing recipes that would be ideal for a New Year's Eve/Day celebration. Both of these recipes are from www.Epicurious.com. Enjoy!

(image from www.Epicurious.com, photo by: SCOTT PETERSON)

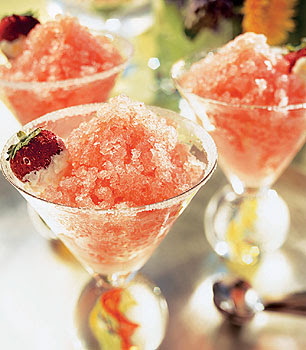
Pink Grapefruit, Strawberry, and Champagne Granita with Sugared Strawberries
Bon Appétit, April 2004

Yield: Makes 6 servings

Use a Microplane grater or the smallest holes on a box grater to remove the lemon peel in thin, fine pieces. Any delicate buttery cookies — such as pirouettes, small shortbreads, or tender madeleines — would be delicious with the granita.

Ingredients:

1 1/4 cups sugar, divided
3/4 cup water
1 cup small strawberries, hulled (about 6 ounces)
3/4 cup fresh pink or ruby grapefruit juice
2 1/4 cups chilled brut Champagne
1 1/2 teaspoons grated lemon peel
9 teaspoons mascarpone cheese*
18 whole small strawberries

Preparation:

Stir 3/4 cup sugar and 3/4 cup water in large saucepan over low heat until sugar dissolves. Cool. Puree 1 cup strawberries in processor. Whisk 1/2 cup puree into sugar syrup. Mix in grapefruit juice, then Champagne. Pour mixture into 8-inch square metal baking pan. Freeze mixture until firm, stirring every 2 hours, about 6 hours. (Can be made 2 days ahead. Cover; keep frozen.)

Mix remaining 1/2 cup sugar and lemon peel in pie plate. Spread 1/2 teaspoon mascarpone around pointed tip half of each whole strawberry. Dip in lemon sugar to coat mascarpone.

Moisten rims of 6 Martini glasses with water; dip rims into remaining lemon sugar. Scrape fork across surface of granita to form ice shavings. Mound granita in glasses. Garnish with sugared berries and serve immediately.

*Available at Italian markets and some supermarkets.

Test-kitchen tip:
To coat Martini glass rims with sugar, barely moisten fingertips and run around edge of each glass, then dip rims into sugar mixture. Keep the coated glasses in the freezer for up to two days before serving the granita.

(image from www.Epicurious.com, photo by: Mark Thomas)

Marinated Shrimp with Champagne Beurre Blanc

Bon Appétit, December 2003

Yield: Makes 8 first-course servings

The classic — and amazingly easy — French sauce made with butter and wine gets a glamorous makeover with Champagne. Feel free to use less-expensive sparkling wine for cooking, but keep the blanc de blancs flowing as an accompaniment.

Ingredients:

Sauce base
2 cups Champagne or other dry sparkling wine
1/3 cup finely chopped shallots
2 tablespoons Champagne vinegar or other white wine vinegar
1/4 teaspoon whole black peppercorns

Shrimp
1 cup Champagne or other dry sparkling wine
1/4 cup extra-virgin olive oil
3 tablespoons minced shallots
1/2 teaspoon freshly ground black pepper
24 extra-large uncooked shrimp (about 2 pounds), peeled with tail left intact, deveined
1 tablespoon minced fresh chives
1 tablespoon minced fresh tarragon
1 tablespoon minced fresh parsley

Nonstick vegetable oil spray

1 cup (2 sticks) chilled unsalted butter, cut into 16 pieces

Preparation:

For sauce base:
Combine Champagne, shallots, vinegar, and peppercorns in heavy medium saucepan. Boil until reduced to 1/4 cup liquid, about 20 minutes. (Can be made 4 hours ahead. Cover and let stand at room temperature.)

For shrimp:
Combine Champagne, olive oil, shallots, and ground pepper in resealable plastic bag. Add shrimp to bag and seal; shake bag to coat shrimp evenly. Marinate shrimp at room temperature at least 30 minutes and up to 1 hour, turning bag occasionally. Mix chives, tarragon, and parsley in small bowl.

Preheat broiler. Spray broiler pan with nonstick vegetable oil spray. Drain shrimp; discard plastic bag with marinade. Arrange shrimp on prepared pan in single layer. Broil shrimp until just opaque in center, about 2 minutes per side. Stand 3 shrimp, tails upright, in center of each plate.

Rewarm sauce base over medium-low heat. Whisk in butter 1 piece at a time, just allowing each to melt before adding next (do not boil or sauce will separate). Season beurre blanc to taste with salt and pepper.

Spoon warm sauce around shrimp. Sprinkle with fresh herbs and serve.


Visit Jet-Chef.com to find a caterer, personal chef or restaurant for your special meal or occasion!

Are you a caterer, personal chef or restaurant and want to be part of the Jet-Chef.com success? Log on to Jet-Chef.com and start your listing today for as little as $29.00/6 month membership! Contact us via email at info@imaiusa.com or call us toll-free at 1-877-774-1255.

Tuesday, December 30, 2008

Today is National Bicarbonate of Soda Day!

Today is National Bicarbonate of Soda Day! Pure Bicarbonate of Soda is also known as Baking Soda, a leavening agent along with other agents such as Baking Powder and Yeast.

Bicarbonate of Soda (NaHCO3) is a white crystalline alkali which effervesces (fizzes) when it comes into contact with a variety of acids (like honey, molasses, brown sugar, sour cream, yogurt, cocoa, citrus juice or fruits). It then produces gasses, namely carbon dioxide. It is this chemical reaction that facilitates the rising action in baked goods.

(image from www.thedailygreen.com)

I recently enjoyed some amazing soda bread, and wanted to pass along a fantastic sounding recipe for Irish Soda Bread from Epicurious:

Irish Soda Bread with Raisins
Bon Appétit February 2005
by Anitra Earle, Yonkers, NY

Yield: Makes 1 loaf

Anitra Earle of Yonkers, New York, writes: "I'm a perfume detective who hunts down hard-to-find and discontinued scents. One of the benefits of running my business from home is that I get to cook every day. I usually make dishes that I've relied on for years."

Ingredients:

Nonstick vegetable oil spray
2 cups all purpose flour
5 tablespoons sugar, divided
1 1/2 teaspoons baking powder
1 teaspoon salt
3/4 teaspoon baking soda
3 tablespoons butter, chilled, cut into cubes
1 cup buttermilk
2/3 cup raisins

Preparation:

Preheat oven to 375°F. Spray 8-inch-diameter cake pan with nonstick spray. Whisk flour, 4 tablespoons sugar, baking powder, salt, and baking soda in large bowl to blend. Add butter. Using fingertips, rub in until coarse meal forms. Make well in center of flour mixture. Add buttermilk. Gradually stir dry ingredients into milk to blend. Mix in raisins.

Using floured hands, shape dough into ball. Transfer to prepared pan and flatten slightly (dough will not come to edges of pan). Sprinkle dough with remaining 1 tablespoon sugar.

Bake bread until brown and tester inserted into center comes out clean, about 40 minutes. Cool bread in pan 10 minutes. Transfer to rack. Serve warm or at room temperature.

(image from home.zenana.org.uk)

And, of course, Bicarbonate of Soda is found in many antacid remedies. At this time of the year when we are eating more, having more cocktails and attending late night parties, Bicarbonate of Soda can be our best friend in recovering from the festivities as well!


Visit Jet-Chef.com to find a caterer, personal chef or restaurant for your special meal or occasion!

Are you a caterer, personal chef or restaurant and want to be part of the Jet-Chef.com success? Log on to Jet-Chef.com and start your listing today for as little as $29.00/6 month membership! Contact us via email at info@imaiusa.com or call us toll-free at 1-877-774-1255.

Monday, December 29, 2008

Today is Pepper Pot Day!

Today is Pepper Pot Day, and I had to do some research to better understand what Pepper Pot is. Traditionally, Pepper Pot is a soup made with vegetables and tripe and seasoned with peppercorns that often contains dumplings. There are many Pepper Pot recipes with a Caribbean vibe that include the use of cassareep, which is made from the sap of the cassava.

(image from www.recipe.dominica-weekly.com)

Here is a recipe for a version of a Guyana Pepper Pot, from RecipeZaar.com:

Guyana Pepper Pot

Cook's Note: Pepper pot, the national dish of Guyana, is an Amerindian meat stew which uses cassareep. Cassareep is a preservative made from grated cassava and flavoured with cinnamon and brown sugar. The Amerindians developed cassareep as a way of preserving meats in the days before refrigeration. Do not refrigerate leftovers. This dish develops flavour when left over a period of days. If not refrigerated, it MUST be reheated to a boil every day. In the early days, a pepperpot was always in the kitchen, and more meat was added to it each day, keeping the pot going for years. This recipe has been halved from the original.

Serves 12 , 1 pot (change servings and units)

Ingredients:

1 lb stewing beef or beef brisket
1 lb pork, trotters (or cow's heels) (optional)
1/2 lb pigs tail (optional)
1/2 cup amerindian seasoning (cassareep)
1 red hot pepper
1 cinnamon stick (1 in x 1 in)
1 ounce sugar
salt
2 stalks basil
1 bunch fine fresh thyme
1 large chopped onion
3 chopped garlic cloves

Preparation:

Soak pig tails and scald.
Cook cow heel or trotters in covered pan with water to boil.
Skim.
When half tender add all the other meats hot water to cover.
Add all other ingredients and simmer gently for about one hour until meat is tender.
Adjust flavor with salt and sugar.
Note: This dish develops flavor when left over a period of days. If left unrefrigerated, it must be reheated to a boil every day.
Pepperpot is popularly served with dense bread and butter, though it is equally as good with rice or roti.

There is also a version called Philadelphia Pepper Pot, and this stew has its origins in the American Revolutionary War. According to Wikipedia, " Pepper Pot is a thick stew of beef tripe, vegetables, pepper and other seasonings...the winter of 1777–1778 in Valley Forge was exceptionally harsh. Farmers in the area sold their food to the British for cash rather than the weak continental currency offered by George Washington's soldiers. The Continental Army was running low on food, and survived on a stew made of tripe, vegetables, and whatever else they could find to stay alive."

Here is a recipe for traditional Philadelphia Pepper Pot that sounds simply divine enjoyed on a cold night in a cozy home from About.com:

Philadelphia Pepper Pot Soup Recipe
By Peggy Trowbridge Filippone, About.com

Tripe, veal, and vegetables combine to make a thick, hearty soup traditionally known as pepper pot. Do not be deterred by the list of ingredients. This soup is quite easy to make. It does require about 2-1/2 hours of slow simmering, so plan ahead.

Prep Time: 20 minutes
Cook Time: 2 hours, 30 minutes

Ingredients:

1-1/2 pounds beef honeycomb tripe
3 teaspoons salt
Water with 1 Tablespoon salt
3 Tablespoons butter
1 cup chopped onions
1 whole onion, studded with 3 cloves
1 rib celery, sliced thin
1 large carrot, peeled and sliced thin
1 leek (about 1 cup), washed, sliced, including tender green part
1/2 cup diced green bell pepper
4 cups chicken broth
1 cup water
1 small meaty veal knuckle
2 garlic cloves, minced
1/2 teaspoon ground chipotle chile powder or cayenne pepper
1 bay leaf, broken in half
1 teaspoon dried oregano
1 teaspoon dried basil
1/2 teaspoon dried thyme
2 teaspoons salt, or to taste
1/2 teaspoon freshly ground black pepper
2 cups 1/2-inch-diced potatoes
1 cup evaporated milk or heavy cream
1/2 cup chopped fresh parsley
1 Tablespoon cornstarch dissolved in 3 Tablespoons water
1/3 cup butter for garnish
1/2 cup chopped fresh parsley for garnish

Preparation:

Rinse tripe under cold water. Drain and place on a cutting board. Sprinkle with salt and rub into tripe to clean the crevices. Rinse again to remove salt.

Place tripe in a 3-quart saucepan. Add enough water to cover by 2 inches, with the tablespoon of salt stirred in. Slowly bring to a boil and simmer 15 minutes. Drain tripe and let cool. Cut into 1/2-inch cubes and set aside.

Heat a large Dutch oven or stockpot over medium heat. Add 3 tablespoons of butter, chopped onions, whole onion, celery, carrots, leeks, and bell pepper. Stir to coat the vegetables, cover, reduce heat, and simmer, stirring occasionally, until onions are softened and translucent, about 10 minutes. Do not brown.

Add broth and water to the pot, along with the veal knuckle, tripe, garlic, chile powder, bay leaf, oregano, basil, thyme, salt, and pepper. Bring to a boil, reduce heat, and simmer for 1-1/2 hours.

Remove the veal knuckle and pick off the meat, cutting any large pieces down to bite size. Discard the whole onion. Return the veal meat to the pot, along with potatoes, evaporated milk, and parsley. Simmer 15 to 20 minutes, until potatoes are tender. Stir in cornstarch mixture and simmer 2 to 3 minutes until slightly thickened.

Swirl butter into the hot soup until melted and immediately ladle into bowls to serve. Sprinkle with chopped parsley.

Yield: 6 servings


Visit Jet-Chef.com to find a caterer, personal chef or restaurant for your special meal or occasion!

Are you a caterer, personal chef or restaurant and want to be part of the Jet-Chef.com success? Log on to Jet-Chef.com and start your listing today for as little as $29.00/6 month membership! Contact us via email at info@imaiusa.com or call us toll-free at 1-877-774-1255.

Sunday, December 28, 2008

Flavor Trends for 2009: Peri-Peri

From my previous posts (November 16, November 19, November 23, December 3, December 10th), I revealed that I am truly fascinated with food trends, and experimenting with new flavors. Recently, Mintel, the consumer, media and market research company, tallied the top food and flavor trends for 2009. Here are the top seven flavor trends for 2009:

1. Persimmon (featured in November 16th blog post)
2. Starfruit (featured in November 19th blog post)
3. Lavender (featured in November 23rd blog post)
4. Cactus (featured in December 3rd blog post)
5. Chimichurri (featured in December in December 10th blog post)
6. Peri-Peri
7. Masala

In this post, I will spotlight the interesting flavor of Peri-Peri! I will continue to highlight each trend, with a recipe or two that I recommend. Please feel free to bookmark and/or follow this blog so you can get a great snapshot of all seven in the weeks to come. I also welcome any recipes that include Peri-Peri that you would like to share.

(image from www.south-africa-tours-and-travel.com)

#6 Peri-Peri: What is Peri-Peri?

Peri-Peri (or Piri-Piri) is a sauce created from the dried piri-piri chiles. These chiles are also known as African Birdseye chiles and they help to create a hot, spicy sauce. It is believed that Peri-Peri was introduced in Africa over 400 years ago by the Portuguese and has become an important part of African cuisine as a marinade for a variety of meats and a condiment that is found in many homes in East Africa.

(image from www.quintadavo.com)

Here is a recipe from www.chilliworld.com to make a simple Peri-Peri Sauce:

Piri-Piri Sauce:

Ingredients:

4 chili peppers, cleaned and finely chopped (Look for Cayenne peppers and if you can't get them New Mexico or pequin.)
Juice of one Lemon
3 cloves of garlic, minced
One tablespoon of chopped fresh parsley, (optional)
One tablespoon Paprika
4 tablespoons of Olive Oil
1 teaspoon Salt

Preparation:

Remove stems and seeds from peppers - take the necessary precautions when handling hot peppers.

Grind and mix all ingredients to a fine paste by hand or use a blender or food processor. If you want to go hotter add ground cayenne pepper of pepper flakes to taste. Cook in a hot frying-pan for a few minutes.

Store in a sterilized jar in the refrigerator. The flavour will develop over the following week.

(image from www.nandos.co.uk)

Here is a video that is a great tutorial for Peri-Peri Chicken:


Main Dish:How To Make Chicken Piri-Piri

And a fantastic recipe using Peri-Peri sauce with Prawns from www.Epicurious.com!

Prawns Peri-Peri
Epicurious © 1998
by Lannice Snyman
Rainbow Cuisine: A Culinary Journey Through South Africa

Yield: Makes 3-4 servings

Editor's note: The recipe and introductory text below are excerpted from Lannice Snyman's book Rainbow Cuisine: A Culinary Journey Through South Africa. Snyman also shared some helpful cooking tips exclusively with Epicurious, which we've added at the bottom of the page. For your convenience, we've converted the measures — with as much accuracy as possible — from South African to American. For those who have metric equipment and wish to follow Snyman's recipe to the milliliter, we've included the original measures too.

Ingredients:

18-24 large prawns (large shrimp)
200 g (3/4 cup) butter
10 ml (2 teaspoons) crushed garlic
30 ml (2 tablespoons) lemon juice
30 ml (2 tablespoons) peri-peri sauce (recipe below)
salt, milled black pepper

PERI-PERI SAUCE
50 g (1 1/2 ounces) red chillies, very finely chopped
5 cloves garlic, crushed
500 ml (2 cups) olive oil
pared rind of 1 small lemon (use a vegetable peeler to remove the skin in thin strips)

Preparation:

PERI-PERI SAUCE
Mix the ingredients together in a bottle and shake well. You can make the sauce ahead and store it in the fridge; the flavour improves with age, reaching its peak at two weeks.

Slit prawns down their backs and devein. Leave heads on, or remove them if you prefer. Depending on the size of your frying pan, cook them in one or two batches.

Heat the butter gently and add the garlic and lemon juice. Don't let the garlic burn. Add prawns and peri-peri sauce. (Shake first to make sure you get some of the chilli and garlic as well.)

Sizzle for 4-5 minutes, turning frequently, until cooked. Season with salt and pepper and tip into a warm serving bowl. Garnish, if you wish, with chopped fresh parsley. Serve with rice or bread and butter.


Visit Jet-Chef.com to find a caterer, personal chef or restaurant that features unique, exotic flavor trends that include peri-peri and so many more!

Are you a caterer, personal chef or restaurant and want to be part of the Jet-Chef.com success? Log on to Jet-Chef.com and start your listing today for as little as $29.00/6 month membership! Contact us via email at info@imaiusa.com or call us toll-free at 1-877-774-1255.

Today is National Chocolate Candy Day!

Today is National Chocolate Candy Day! I love being a part of celebrating anything that includes chocolate!

(image from www.sweetlucakeshop.com)

Here is a video that features chocolatier Jacques Torres making a chocolate covered treat that looks fantastic!


(image from http://assets.m80im.com)

And from Epicurious is an amazing recipe for Chocolate Truffles that I truly want to create!

Chocolate Truffle Croquembouche
Bon Appétit December 1991

Yield: Makes 76 truffles

Ingredients:

Truffles:

1 cup plus 2 tablespoons whipping cream
3/4 cup (1 1/2 sticks) unsalted butter
2 1/4 pounds bittersweet (not unsweetened) or semisweet chocolate,chopped
3/4 cup sour cream
6 tablespoons orange liqueur
1 1/2 tablespoons grated orange peel


1 1/2 cups powdered sugar
1 1/2 cups unsweetened cocoa powder

Dipping:

1 3/4 pounds imported white chocolate (such as Lindt), chopped

1 1/2 pounds bittersweet (not unsweetened) chocolate, chopped

38 candied violets (optional)*

*Available at specialty foods store.

Assembly:

1 12-inch styrofoam cone*
Rose leaves and miniature white roses or other small flowers
*Styrofoam cones are available at most floral and party supply stores.

Preparation:

Bring cream and butter to boil in heavy large saucepan. Reduce heat to medium; stir until butter melts. Add chocolate; whisk until melted and smooth. Remove from heat. Whisk in sour cream, liqueur and orange peel. Pour into 9x13-inch baking dish. Refrigerate mixture until firm enough to hold shape, about 1 hour.

Line 4 large cookie sheets with foil; sift powdered sugar over 2 sheets and cocoa powder over 2 sheets. Using 3/4-ounce ice cream scoop (1 1/2 tablespoons), scoop truffle mixture, mounding slightly, and release onto sugar-dusted sheet. Repeat to form total of 28 large truffles on sugar-dusted sheets and 28 on cocoa-dusted sheets. Using 1/4-ounce ice cream scoop (1 1/2 teaspoons), scoop truffle mixture and release onto sugar-dusted sheet. Repeat to form total of 10 small truffles on sugar-dusted sheets and 10 on cocoa-dusted sheets. Freeze truffles 10 minutes.

Roll each truffle on sugar-dusted sheets in sugar, then roll between palms of hands into smooth round and set onto clean cookie sheet. Roll each truffle on cocoa-dusted sheets in cocoa, then roll between palms of hands into smooth round and set onto same cookie sheets as sugar-dusted truffles. Freeze 1 hour.

Dipping:

Line 2 cookie sheets with foil. Melt white chocolate in top of double boiler over simmering water, stirring until candy thermometer registers 115°F. Remove from over water. Submerge 1 large sugar-dusted truffle in white chocolate, tilting pan if necessary. Using long fork, lift truffle from chocolate. Tap fork gently against side of pan (if necessary) to remove excess chocolate. Using knife as aid, slide truffle off fork and onto clean foil-lined cookie sheet. Wipe fork clean. Repeat process with all remaining sugar-dusted truffles. Freeze for 15 minutes.

Reheat remaining white chocolate to 115°F. over simmering water. Repeat dipping process to give truffles a double coating of white chocolate.

Melt bittersweet chocolate in top of clean double boiler over simmering water, stirring until candy thermometer registers 115°F. Dip spoon into bittersweet chocolate and wave quickly white chocolate-coated truffles, creating zigzag lines. Refrigerate truffles.

Line 2 more cookie sheets with foil. Using dipping process described above, dip cocoa-dusted truffles into bittersweet chocolate, dipping each truffle only once. Immediately top each with candied violet. Refrigerate truffles 1 hour. (Can be prepared 3 weeks ahead. Cover and chill truffles and remaining melted bittersweet chocolate separately.)

Assemble:

Remelt remaining bittersweet chocolate. Brush melted bittersweet chocolate in 2-inch-wide strip down length of cone. Wrap waxed paper around cone, covering completely and pressing against chocolate to adhere. Place cone on platter. Holding toothpick at sharp angle, press 2/3 of toothpick into cone near base. Press 1 large truffle onto toothpick. Repeat with more toothpicks and remaining large truffles, alternating dark and white truffles and attaching in spiral design toward top of cone. Begin attaching small truffles 4 inches from top of cone and continue to cover completely. (Can be prepared 1 day ahead. Cover and chill.) Press rose leaves between truffles on cone, covering any spaces. Press toothpicks into roses and attach to leaves between truffles.


Visit Jet-Chef.com to find a caterer, personal chef or restaurant for your special meal or occasion!

Are you a caterer, personal chef or restaurant and want to be part of the Jet-Chef.com success? Log on to Jet-Chef.com and start your listing today for as little as $29.00/6 month membership! Contact us via email at info@imaiusa.com or call us toll-free at 1-877-774-1255.

Saturday, December 27, 2008

Today is National Fruit Cake Day!

Yes, I am getting a bit caught up! What did we miss?

December 25th was National Pumpkin Pie Day

(image from www.scienceblogs.com)

December 26th was National Candy Cane Day

(image from www.bfeedme.com)

Both of those truly pale in comparison to today...National Fruit Cake Day!

(image from www.meatlessmonday.com)

Unfortunately, Fruit Cake gets a bad rap. Fruit Cake is traditionally re-gifted, and I am sometimes convinced that the one I got this year was the one that I re-gifted in 1997. Just a hunch...Traditional fruit cake is soaked in and saturated with liqueurs or brandy, which was done to prevent mold. Which furthers still the sentiment that these are meant to be passed around year after year!

It is my hope that I help to elevate the status of the Fruit Cake, and that by celebrating National Fruit Cake Day, we all embrace the wonder that is Fruit Cake!

Here is my favorite recipe I found to make Fruit Cake, from www.foodnetwork.com. This looks like a future classic in my home!

Free Range Fruitcake
Recipe courtesy Alton Brown

Ingredients:

1 cup golden raisins
1 cup currants
1/2 cup sun dried cranberries
1/2 cup sun dried blueberries
1/2 cup sun dried cherries
1/2 cup dried apricots, chopped
Zest of one lemon, chopped coarsely
Zest of one orange, chopped coarsely
1/4 cup candied ginger, chopped
1 cup gold rum
1 cup sugar
5 ounces unsalted butter (1 1/4 sticks)
1 cup unfiltered apple juice
4 whole cloves, ground
6 allspice berries, ground
1 teaspoon ground cinnamon
1 teaspoon ground ginger
1 3/4 cups all purpose flour
1 1/2 teaspoons salt
1 teaspoon baking soda
1 teaspoon baking powder
2 eggs
1/4 to 1/2 cup toasted pecans, broken
Brandy for basting and/or spritzing

Directions:

Combine dried fruits, candied ginger and both zests. Add rum and macerate overnight, or microwave for 5 minutes to re-hydrate fruit.

Place fruit and liquid in a non-reactive pot with the sugar, butter, apple juice and spices. Bring mixture to a boil stirring often, then reduce heat and simmer for 5 to 10 minutes. Remove from heat and cool for at least 15 minutes. (Batter can be completed up to this point, then covered and refrigerated for up to 2 days. Bring to room temperature before completing cake.)

Heat oven to 325 degrees.

Combine dry ingredients and sift into fruit mixture. Quickly bring batter together with a large wooden spoon, then stir in eggs one at a time until completely integrated, then fold in nuts. Spoon into a 10-inch non-stick loaf pan and bake for 1 hour. Check for doneness by inserting toothpick into the middle of the cake. If it comes out clean, it's done. If not, bake another 10 minutes, and check again.

Remove cake from oven and place on cooling rack or trivet. Baste or spritz top with brandy and allow to cool completely before turning out from pan.

When cake is completely cooled, seal in a tight sealing, food safe container. Every 2to 3 days, feel the cake and if dry, spritz with brandy. The cake's flavor will enhance considerably over the next two weeks. If you decide to give the cake as a gift, be sure to tell the recipient that they are very lucky indeed.


Visit Jet-Chef.com to find a caterer, personal chef or restaurant for your special meal or occasion!

Are you a caterer, personal chef or restaurant and want to be part of the Jet-Chef.com success? Log on to Jet-Chef.com and start your listing today for as little as $29.00/6 month membership! Contact us via email at info@imaiusa.com or call us toll-free at 1-877-774-1255.

Wednesday, December 24, 2008

Today is National Egg Nog Day!

Today is National Egg Nog Day! I love egg nog, so I am sure that I will be enjoying one of these tasty recipes from Epicurious!

(image from www.mylifetime.com)

Here is a recipe for an amazing and traditional style egg nog!

Baltimore Egg Nog
House & Garden Drink Guide, November 1973

Yield: Makes about 30 servings

Beat the egg yolks and sugar together until thick. Slowly stir in the brandy, rum, peach brandy, milk and cream. Refrigerate until thoroughly chilled and pour into a punch bowl. Beat the egg whites until stiff and fold gently into the eggnog. Grate a little nutmeg on top and serve in 4-ounce punch glasses.

Ingredients:

12 eggs, separated
2 cups superfine sugar
1 pint brandy
1/2 pint light rum
1/2 pint peach brandy
3 pints milk
1 pint heavy cream
Nutmeg

And, if that is not enough, egg nog for dessert! YUM!

(image from www.Epicurious.com, photo by: Kenji Toma)

Egg Nog Flan on Cinnamon Crust
Bon Appétit, December 2008
by Claudia Fleming

Yield: Makes 8 to 10 servings

Flan is amped up with holiday spices and a crispy cookie crust.

Ingredients:

Crust:
1 cup all purpose flour
1/2 teaspoon (generous) ground cinnamon
1/8 teaspoon (generous) freshly grated or ground nutmeg
1/8 teaspoon (generous) salt
1 large egg yolk
1 tablespoon whipping cream
6 tablespoons (3/4 stick) unsalted butter, room temperature
3 tablespoons sugar

Flan:
1 3/4 cups sugar, divided
1/3 cup water
1 tablespoon light corn syrup
6 large egg yolks
2 large eggs
2 cups heavy whipping cream, divided
2 cups whole milk
2 tablespoons dark rum
1 tablespoon freshly grated or ground nutmeg

Rum whipped cream:
1 cup chilled heavy whipping cream
1/4 cup powdered sugar
1 tablespoon dark rum
3/4 teaspoon vanilla extract
Freshly grated or ground nutmeg (for sprinkling)

Preparation:

For crust:
Whisk first 4 ingredients in small bowl to blend. Whisk egg yolk and 1 tablespoon whipping cream in another small bowl to blend. Using electric mixer, beat butter and sugar in medium bowl until blended. Beat in yolk mixture (mixture may look curdled). Beat in flour mixture just until blended (dough will be slightly sticky). Using floured hands, gather dough together and form into disk. Wrap in plastic; chill at least 1 hour. DO AHEAD: Can be made 1 day ahead. Keep chilled. Let soften slightly at room temperature before rolling out.

Position rack in center of oven and preheat to 375°F. Roll out dough on lightly floured parchment paper to 9-inch round. Using 8 1/2-inch-diameter plate as guide, cut out round. Transfer dough round, still on parchment, to baking sheet. Pierce dough all over with fork. Bake until crust is golden brown and baked through, 28 to 30 minutes. Cool crust completely on baking sheet. DO AHEAD: Can be made 1 day ahead. Cover and store at room temperature.

For flan:
Combine 1 cup sugar, 1/3 cup water, and corn syrup in heavy medium saucepan. Stir over medium-low heat until sugar dissolves. Increase heat and boil without stirring until mixture turns deep amber, occasionally swirling pan and brushing down sides with wet pastry brush, about 10 minutes. Immediately pour caramel into 9-inch-diameter cake pan with 2-inch-high sides. Using oven mitts to protect hands, tilt pan to swirl caramel over bottom and halfway up sides of pan. Cool while preparing custard.

Position rack in center of oven and preheat to 325°F. Whisk egg yolks, eggs, 1 cup cream, and 1/4 cup sugar in large bowl to blend. Combine 1 cup cream, milk, rum, nutmeg, and 1/2 cup sugar in large saucepan. Stir rum mixture over medium heat until sugar dissolves; increase heat and bring to simmer. Gradually whisk hot rum mixture into yolk mixture. Pour mixture through fine strainer into cake pan with caramel. Place cake pan in large roasting pan. Add enough hot water to roasting pan to come halfway up sides of cake pan. Cover roasting pan loosely with foil.

Bake flan until set, about 1 hour 40 minutes (center may move slightly when pan is gently shaken, but top will feel set when lightly pressed). Remove from oven; let flan stand in roasting pan with water 10 minutes. Remove cake pan from roasting pan. Transfer directly to refrigerator; chill uncovered overnight. DO AHEAD: Can be made 2days ahead. Cover and keep chilled.

For rum whipped cream:
Combine all ingredients except nutmeg in large bowl. Using electric mixer, beat until peaks form. DO AHEAD: Can be made 2 hours ahead. Cover and chill. Rewhisk to thicken, if necessary, before using.

Run small knife around flan to loosen from pan. Place baked crust atop flan in pan. Place large platter atop flan with crust. Using both hands and holding platter and pan with flan firmly together, invert flan with crust onto platter. Scrape any caramel remaining in pan over flan. Top center of flan with mound of rum whipped cream. Sprinkle cream lightly with grated nutmeg.


Visit Jet-Chef.com to find a caterer, personal chef or restaurant for your special meal or occasion!

Are you a caterer, personal chef or restaurant and want to be part of the Jet-Chef.com success? Log on to Jet-Chef.com and start your listing today for as little as $29.00/6 month membership! Contact us via email at info@imaiusa.com or call us toll-free at 1-877-774-1255.

Tuesday, December 23, 2008

Today is National Pfeffernuesse Day!

That is right, today is National Pfeffernuesse Day! Pfeffernuesse cookies are a traditional cookie in Central Europe. According to Wikipedia, the name Pfeffernuesse "translates to pepper nuts in German, Danish and Dutch, describing their spicy taste as well as the fact that many recipes actually call for almonds or walnuts and a small amount of black pepper to be used".

(image from www.dreamstime.com)

From what I can gather from a variety of sources, these cookies are a bit like biscuits as they are harder and crunchy. However, if allowed to sit for a few days, they do become softer. They sound wonderfully vibrant to me, and I am looking forward to experimenting with Pfeffernuesse for a new holiday cookie tradition!

Here is a classic Pfeffernuesse cookie recipe from www.christmas-baking.com.

Pfeffernuesse

Ingredients:

2 eggs
1 1/2 c. sugar
1/4 c. candied ginger, citron or orangeat
1/3 c. almonds
zest of 1/2 lemon or 1/2 tsp lemon extract
2 1/2 c. flour
1 tsp. baking powder
1 tsp. cinnamon
1/2 tsp. ground cloves
1/2 tsp. ground cardamon
1/2 tsp. ground ginger
1/4 tsp. pepper
1/4 c. milk

Glaze:

1 1/2 c. powdered sugar
juice of half a lemon

Directions:

Whip together eggs and sugar on high speed until tripled in volume and almost white, about three to five minutes. Finely chop crystallized ginger or citron; grind nuts. Add crystallized ginger (or citron), nuts and lemon zest or extract to egg mixture and mix until combined. Change to the paddle blade. Sift together spices, flour and baking powder, and slowly add to eggs mixture. If the dough is dry and crumbly, add milk one tablespoon at a time until dough holds together. Knead gently for a minute or two until the dough is smooth. Cover and let sit for one day; this step is important to allow the flavors to meld.

The next day, preheat oven to 325 degrees. Form dough into balls about 1 to 1 1/2 inches in diameter; place on a parchment covered baking sheet. Bake 20 to 25 minutes until browned. Allow to cool 20 minutes.

In a small bowl, whisk together powdered sugar and lemon juice; add a bit of hot water for a thinner glaze if you like. Dip the tops of the cookies into the glaze and allow excess to drip off. (A cooling rack placed over the parchment-lined baking sheets works well.) Store in an airtight container. These keep for a long time, and the flavor improves with age.


Visit Jet-Chef.com to find a caterer, personal chef or restaurant for your special meal or occasion!

Are you a caterer, personal chef or restaurant and want to be part of the Jet-Chef.com success? Log on to Jet-Chef.com and start your listing today for as little as $29.00/6 month membership! Contact us via email at info@imaiusa.com or call us toll-free at 1-877-774-1255.
Monday, December 22, 2008

Today is National Date Nut Bread Day!

Today is National Date Nut Bread Day! I must confess that I have never tried Date Nut Bread, and have never heard of this particular kind of bread. I did a little research and found that Date Nut Bread is very popular and many people love a "canned" Date Nut Bread although folks are all over food and baking forums asking where to find the canned versions, it seems stores are no longer stocking it). Better yet, it is apparently quite the yummy treat spread with cream cheese.

(image from www.quality-vintage-ads.co.uk)

Most of the recipes I found on line were basically the same version of this one from www.About.com.

(image from www.everydayhealth.com)

Date Nut Bread Recipe
By Diana Rattray, About.com

Date nut bread is made with chopped dates, butter, boiling water, egg, and walnuts or pecans.

Cook Time: 55 minutes

Ingredients:

1 cup boiling water
8 ounces chopped dates
2 tablespoons butter
3/4 cup granulated sugar
1/4 cup brown sugar
1 large egg
2 1/4 cups flour, stir before measuring
1 tablespoon baking powder
1/2 teaspoon salt
1/2 cup chopped walnuts or pecans

Preparation:

Grease a 9x5x3-inch loaf pan.
Pour boiling water over dates in a medium bowl; add butter and set aside. With mixer, beat sugars and egg until light. In another bowl, combine the flour, baking powder, and salt. Add to the sugar mixture, alternating with the date and water mixture. Stir in chopped nuts. Bake at 325° for 45 to 55 minutes, or until a wooden pick inserted in center comes out clean.

(image from www.bakeorbreak.com)

I also found this recipe, which sounds like a wonderfully different twist on the "traditional" Date Nut Bread. This recipe is from www.bakeorbreak.com:

Kahlua Date Nut Bread

Ingredients:

1 cup chopped, pitted dates
1/2 cup Kahlua
2/3 cup firmly packed brown sugar
2 tablespoons butter, softened
1 large egg
2 cups sifted all-purpose flour
1 teaspoon baking soda
1 teaspoon salt
2/3 cup chopped pecans

Preparation:

Preheat oven to 350°.

Combine dates and Kahlua. Set aside and let stand.

Beat sugar, butter, and egg together until creamy.

In a separate bowl, combine flour, baking soda, and salt. Alternate adding flour mixture and date mixture to the sugar mixture. Stir in pecans. Put batter in sprayed/greased loaf pan(s). Let batter stand in pan(s) for about 5 minutes.

Bake until done. For a regular loaf pan, bake 60 to 70 minutes. For medium loaf pans, bake 50 to 60 minutes. For small loaf pans, bake 45 to 50 minutes.


Visit Jet-Chef.com to find a caterer, personal chef or restaurant for your special meal or occasion!

Are you a caterer, personal chef or restaurant and want to be part of the Jet-Chef.com success? Log on to Jet-Chef.com and start your listing today for as little as $29.00/6 month membership! Contact us via email at info@imaiusa.com or call us toll-free at 1-877-774-1255.

Sunday, December 21, 2008

Today is National Hamburger Day!

Today is National Hamburger Day, a great excuse for me to fire up the grill!

(image from www.dailymail.co.uk)

Okay, I probably will not be making that hamburger extravaganza, however, this recipe from www.Epicurious.com sounds like hamburger heaven!

Bacon Swiss Burgers with Tomato and Avocado
Epicurious December 2008
by Sheila Lukins
Ten: All the Foods We Love... and 10 Recipes for Each

Yield: Serves 4

Note: A bacon Swiss burger embellished with ripe tomato and avocado: delectable! In this burger, I've spiced up the meat with thyme and Worcestershire sauce, which hint at the Mediterranean and at the steak house. In this case, a soft white bun is the best choice—any other type of bun and the burger might become too huge to eat. But of course, that's what helps to make it delectable. Serve your favorite condiments alongside.

Ingredients:

8 slices bacon
1 pound ground beef chuck or sirloin
1 teaspoon Worcestershire sauce
1 or 2 dashes Tabasco sauce
1/4 teaspoon dried thyme leaves
Salt and freshly ground black pepper, to taste
Vegetable oil, for grilling
4 slices Swiss cheese
4 hamburger buns, toasted, for serving
Thinly sliced ripe tomato, for garnish
Thinly sliced red onion, for garnish
Sliced ripe avocado, for garnish
Boston lettuce leaves, for garnish

Preparation:

1. If you will be grilling the burgers, preheat a barbecue grill to medium-high.

2. While the grill is heating up, cook the bacon on the stovetop in a large skillet over medium-low heat until it is just crisp, 6 to 7 minutes. Transfer the bacon to a plate lined with paper towels and set it aside to drain. (If you prefer to panfry the burgers, reserve 2 tablespoons of the bacon fat in the skillet.)

3. Place the beef, Worcestershire, Tabasco, thyme, and salt and pepper in a bowl, and toss lightly with a fork to combine. Form the mixture into 4 patties, each about 3 inches in diameter and 1 inch thick.

4. When you are ready to grill the burgers, oil the grill grate well. Add the burgers and grill for about 3 minutes for rare, 4 minutes for medium-rare meat. Turn them over and grill for another 3 or 4 minutes, topping the burgers with the cheese in the last minute of cooking. (Or panfry the burgers in the hot bacon fat over medium heat for 3 minutes per side for rare meat, adding the cheese as described.)

5. Place the burgers on the toasted buns, and top them with the bacon, tomato, onion, avocado, and lettuce. Cover with the tops of the buns and serve immediately.


Visit Jet-Chef.com to find a caterer, personal chef or restaurant for your special meal or occasion!

Are you a caterer, personal chef or restaurant and want to be part of the Jet-Chef.com success? Log on to Jet-Chef.com and start your listing today for as little as $29.00/6 month membership! Contact us via email at info@imaiusa.com or call us toll-free at 1-877-774-1255.

Saturday, December 20, 2008

Today is National Sangria Day!

Today, December 20th is not only National Fried Shrimp Day, but it is also National Sangria Day!

(image from http://wine.about.com, Red and White Wine Sangrias, Photo by LyndseyLew Photography)

I love sangria, and really enjoy sangria with a wonderful variety of tapas! The funny thing about sangria is that in Spain it is kind of considered a cheap and easy party punch that gets one pretty drunk, pretty quickly! Often inexpensive bottles of wine are used, and by infusing that cheap wine and cheap spirits with lots of luscious fruit and other ingredients, it is doctored up to taste much better!

(image from www.ibiza-hotels.com)

I found some really fantastic recipes on Spain Recipes, at www.spain-recipes.com. Here is their recipe for "Strong Sangria"!

Strong Sangria Recipe

Note: For those who like their liquor strong, this powerful sangria recipe aims to please. Fortified with wine, vodka, and gin, this recipe will strip you from your everyday worries (and perhaps, your memory as well). Olé!

Makes 6 glasses
Difficulty: Very easy
Preparation time: 10 minutes

Ingredients:

3 1/4 cups ( 26 fl. oz) dry red wine
2 cups (16 fl. oz) sparkling apple juice
4 tablespoons gin
4 tablespoons citron-flavored vodka
2 tablespoons sugar
Juice of 1 large orange
Juice of 1 large lemon
1 small orange, sliced thin crosswise
1 small lemon, sliced thin crosswise
1 small lime, sliced thin crosswise

Preparation:

Pour all the ingredients into a large pitcher, mix well, and refrigerate. Serve chilled over ice.

Recommended Wine:

Protocolo '02

Wine Spectator: "This plush red is rich with chocolate and black cherry flavors, thick and almost sweet on the palate, with ripe, well-integrated tannins and a spicy finish. Drink now through 2007. 15,000 cases imported. 87 Points."

(image from www.olvera-street.com)


Visit Jet-Chef.com to find a caterer, personal chef or restaurant that will create and serve amazing sangria and more for your special meal or occasion!

Are you a caterer, personal chef or restaurant and want to be part of the Jet-Chef.com success? Log on to Jet-Chef.com and start your listing today for as little as $29.00/6 month membership! Contact us via email at info@imaiusa.com or call us toll-free at 1-877-774-1255.

Today is National Fried Shrimp Day!

Today is National Fried Shrimp Day! I have died and gone to heaven, it is official! One of my favorite things to do in the world is walk the beach in San Clemente to Fisherman's, get an ice cold beer, a basket of popcorn shrimp and enjoy the waves and amazing view up the coast.

(image from www.omahasteaks.com)

Being that winter is upon us here in So Cal, and it would be an awfully chilly adventure to do that today when it is a forecasted high of like 50 degrees, I searched for some other yummy options! Here are a few from www.Epicurious.com! The Mangalore Fried Shrimp sounds deliciously spicy, the Shrimp Tempura Cocktail a tasty spin on the Shrimp Cocktail for holiday parties!

(image from www.calendarlive.com)

Mangalore Fried Shrimp
Epicurious 2004
By Suvir Saran and Stephanie Lyness
Indian Home Cooking

Yield: Makes 4 servings

Jhinga Mangaloree:
This dish is from the southern Indian coastal state of Karnataka, where seafood is an important part of the diet. The shrimp has extraordinary flavor. I sometimes vary the recipe by adding 1 1/2 tablespoons unsweetened shredded coconut along with the mustard seeds, or 2 to 6 chopped small fresh green chiles with the scallion. Serve with green chutney or lemon wedges, lemon rice, and a raita.

Ingredients:

1 pound medium shrimp, peeled and deveined
1/2 teaspoon cayenne pepper
1/4 teaspoon turmeric
1/4 teaspoon mustard powder
2 teaspoons fresh lemon juice
4 teaspoons canola oil
1/2 teaspoon cumin seeds or black mustard seeds
6 fresh or 10 frozen curry leaves, torn into pieces (optional)
3 tablespoons finely chopped scallion
Salt to taste

Preparation:

Rinse the shrimp and pat them dry on paper towels. Put them in a bowl and sprinkle with the cayenne, turmeric, mustard powder, and lemon juice. Stir gently to coat the shrimp evenly with the spices. Cover and refrigerate for 30 minutes.

When the shrimp have marinated, combine the oil, cumin or mustard seeds, and curry leaves, if using, in a large wok, frying pan, or kadai over medium-high heat. Cover, if using mustard seeds (the seeds splatter and pop), and cook until the cumin darkens and/or you hear the mustard seeds crackle, 1 to 2 minutes.

Add the shrimp and cook, stirring, 30 seconds, stirring often.

Add the chopped scallion and cook, stirring, until the shrimp turn pink all over, about 1 minute. Sprinkle with salt and serve hot.

(image from www.nakatorestaurant.com)

Shrimp Tempura Cocktail
Bon Appétit September 2003
by chef Ming Tsai

Yield: Makes 8 appetizer servings

Janet and Travis Kuhl of Cranford, New Jersey, writes: "We recently went to chef Ming Tsai's Blue Ginger restaurant in Wellesley, Massachusetts. Our entire meal was top-notch, but the shrimp cocktail was our favorite."
Poured carefully side by side into a cocktail glass, tomato puree and avocado puree make a colorful dip for the lightly battered and quickly deep-fried shrimp.

Ingredients:

Tomato-chipotle puree
2 tablespoons olive oil
1 onion, chopped
2 large tomatoes, coarsely chopped
3 garlic cloves, minced
1 teaspoon minced canned chipotle chiles*

Avocado puree
2 large ripe avocados, peeled, pitted
1/3 cup chopped fresh cilantro
1/4 cup fresh lime juice
1/4 cup minced shallots
2 tablespoons minced jalapeño chiles

Shrimp tempura
Vegetable oil (for deep-frying)

2 cups rice flour**
2 cups club soda
24 uncooked large shrimp, peeled, deveined, tail shells left intact

4 cups thinly sliced romaine lettuce

Preparation:

For tomato-chipotle puree:
Heat oil in large skillet over medium-high heat. Add onion; sauté until very brown, about 6 minutes. Add tomatoes, garlic, and chipotle chiles. Cook 1 minute. Transfer mixture to blender; puree until smooth. Season with salt and pepper. Transfer puree to bowl. Cover and chill until cold.

For avocado puree:
Combine all ingredients in processor; puree until smooth. Season to taste with salt and pepper. Transfer puree to bowl. Press plastic wrap onto surface of puree; chill at least 20 minutes and up to 3 hours.

For shrimp tempura:
Add enough vegetable oil to heavy large pot to reach depth of 3 1/2 inches. Heat over medium-high heat to 375°F.

Whisk rice flour and club soda in large bowl to blend. Working in batches, dip shrimp into batter and fry until golden brown, about 3 minutes. Using slotted spoon, transfer shrimp to paper towels.

Divide romaine among 8 stemmed cocktail glasses. Simultaneously pour 1/4 cup tomato puree and 1/4 cup avocado puree over romaine in each glass, letting purees meet in center. Hang 3 shrimp over rim of each glass.

*Chipotle chiles canned in a spicy tomato sauce, sometimes called adobo, are available at Latin American markets, specialty foods stores, and some supermarkets.

**Rice flour is available at specialty and natural foods stores.

(image from www.seapak.com)


Visit Jet-Chef.com to find a caterer, personal chef or restaurant that will delight you with fried shrimp and other fried seafood specialties for your special meal or occasion!

Are you a caterer, personal chef or restaurant and want to be part of the Jet-Chef.com success? Log on to Jet-Chef.com and start your listing today for as little as $29.00/6 month membership! Contact us via email at info@imaiusa.com or call us toll-free at 1-877-774-1255.

Friday, December 19, 2008

Today is National Hard Candy Day!

Today is National Hard Candy Day, and I am currently celebrating with a yummy, sticky candy cane! I love hard candy, and there are so many great varieties in the stores at this time of the year...I really love the "old school" kinds of hard candy.

(image from www.www.springhillapts.com)

I would love to make hard candy myself, and found this great video on how hard candy is made:


I guess will let the experts create hard candy so I can make these lovely, peppermint-y sweet and icy creations! This recipe was found on www.Epicurious.com.

(image from www.Epicurious.com, photo by: Romulo Yanes)

Chocolate and Peppermint Candy Ice Cream Sandwiches
Gourmet December 2006

Ingredients:

1 pint superpremium vanilla ice cream, softened slightly
1/4 teaspoon pure peppermint extract
1 cup finely crushed peppermint hard candies (1/4 lb)
16 chocolate wafers such as Nabisco Famous

Special equipment: a 1/4-cup ice cream scoop

Preparation:

Stir together ice cream (reserve pint container), extract, and 1/2 cup crushed candy in a bowl until combined.

Transfer mixture to pint container and freeze until just firm enough to scoop, about 1 hour.

Working very quickly, scoop ice cream onto flat sides of 8 wafers (1 scoop per wafer), then top with remaining 8 wafers, flat sides down. Wrap each sandwich individually with plastic wrap and freeze until firm, about 1 hour. Unwrap sandwiches and roll edges in remaining 1/2 cup crushed candy. Rewrap and freeze until firm, about 1 hour.

Cooks' note:
Ice cream sandwiches keep 3 days.


Visit Jet-Chef.com to find a caterer, personal chef or restaurant that will incorporate hard candy into your special meal or occasion!

Are you a caterer, personal chef or restaurant and want to be part of the Jet-Chef.com success? Log on to Jet-Chef.com and start your listing today for as little as $29.00/6 month membership! Contact us via email at info@imaiusa.com or call us toll-free at 1-877-774-1255.